The Sad Saga of
WVOVW
A Waste Vegetable
Oil Tragicomedy
WVO Experiment High on
Lessons, Low on Miles
CYA
Note: This blog represents only an
account of what we did and what happened to us. This blog is not intended to suggest or demonstrate any steps
or methods. We do not recommend
that you do anything mentioned in this blog nor do we recommend that you do
anything mentioned anywhere else in the universe. This information is meant to
serve only as a case study, as a contribution to the development and use of
biofuels for the public good.
If you wish
to convert a car to run on straight vegetable oil or waste vegetable oil, first
go to
http://voconversionbasics.websitetoolbox.com/post?id=1156996
to learn
about the basics, and then you can use this blog to learn about one single WVO
experiment that taught us a lot, the hard way.
Divine
Intervention?
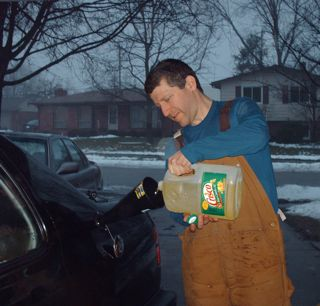
July
23, 2007 88,941
miles
Since my commute
was causing my greatest carbon emissions, I thought it was a no-brainer that I
should go for a veggie oil car. I got an email from my buddy Michael with the
following heading, and I was sure it was divine intervention.
From: Michael
Subject: Re: 1998 Jetta TDI, Black on Black, 5 speed 55mpg - $8500
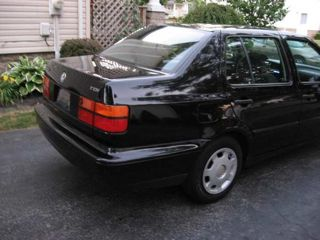
The subject line itself sounded too good to be true. I found out the car had only 89K miles
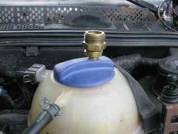
and then the picture of the car that was sent to me by the seller convinced me
that God was trying to help with the mission. He even said the A.C. blew cold.
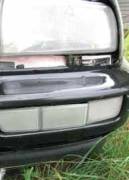
It sure looked
good from this angle! We decided to drive 160 miles to Lorain Ohio to
investigate. This 1997 WV Jetta
TDI was the cleanest used car I had ever seen. We didn’t think to check the compression, since this car
looked like it had been only driven to church one Sunday a month. We should definitely have checked
http://voconversionbasics.websitetoolbox.com/post?id=1156996,
or at least
checked the compression on the vehicle, but we were destined to learn the hard
way.
TDI stands for
"Turbo Direct Inject," which means that the fuel is injected directly
into the piston prior to compression.
Most WVO websites warn against using a direct injection engine with
veggie oil, but a few stalwarts say it can be done with proper preheating.
Indirect injection engines, found on older model diesels seem to be more
forgiving of viscous veggie oil, which even when heated is six times as viscous
as diesel,
We test drove
it, and it ran. It stunk to high
heaven, but that's diesel for you.
Carbon
Near-Neutrality Made (relatively) Easy
July
24 (89,525 miles) through
November
6, 2007 (95,093 miles)
I bought some
brand new low-rolling-resistance tires, Michelin MX4 Energy, and I drove the
Jetta on B99 (99% Biodiesel) for over three months. It seemed to work pretty
well, though it got nowhere near 55 mpg.
I averaged 40 mpg, on a really good day got up to 42 mpg, even on
B99! The only hassle was the only
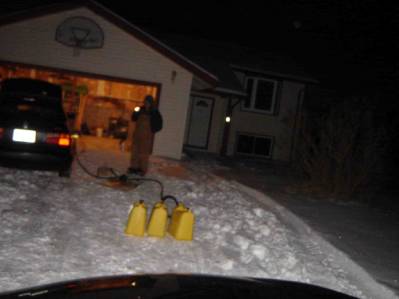
retail source for B99 was about 30 miles from my home. I invested in a bunch of five- gallon
jugs shown below. (I added "Bio" to the Diesel labels.)
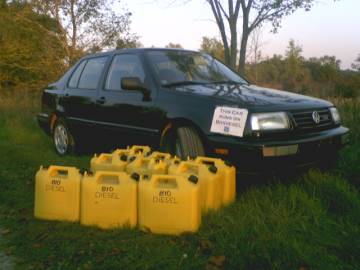
The B99
experiment worked great. I was way closer to carbon neutrality, with very
little downside, as B99 sold about 10 cents cheaper than petrodiesel, and the
exhaust was way less stinky.
The hundred gallons of storage containers allowed me to drive to the B99 retailer only once every two weeks or so.
The exhaust on
biodiesel doesn't smell exactly like French fries…it's more like burning french
fry oil, which is almost exactly what it is.
During this time
I had a VW mechanic tell me that under no circumstances should I use biofuel on
this car. I told him that was the
only reason I had bought the car, but he just shook his head, "Volkswagen
recommends no more than 5% biofuel for their cars, and their engineers know
what works for VW." Reader,
you will have to decide if you agree.
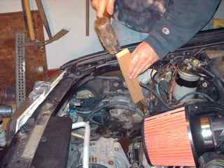
THE CONVERSION
Git
Under the Hood
Day
1: Saturday, November 10, 2007
12:56 pm
B99 isn't
available much past October since it gels when it gets cold, so it was time to
switch over to veggie oil. I
secured the waste soybean oil supply from the cafeteria at the high school
where I teach for a fuel source, and we had decided on the Frybrid system which we determined had the best oil
heating system. We thought it would take a weekend or two to convert, but a
weekend or two turned into a week or two turned into a month or two.
We mainly worked
at night, and so you can see the real time investment involved, I have included
the times at which many of the photos were taken, so you could follow the
process hour by hour.
Generally, text , dates and
times refer to pictures below them.
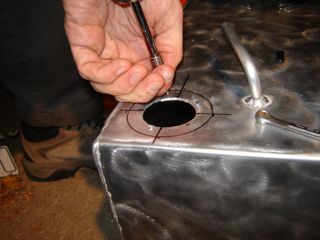
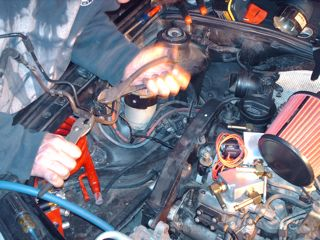
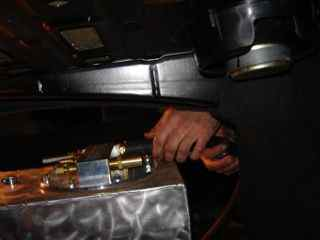
We started by
determining the placement of the tank.
I had seen one tank online installed right at the trunk opening, but we
thought that would impede use of the trunk, so we opted for placing it way at
the back of the trunk-we decided we wanted a cool fuel filler too, outside of
the car to prevent trunk messes.
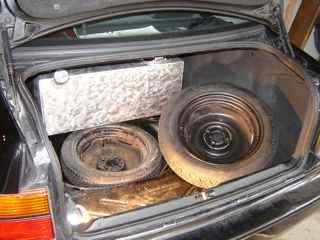
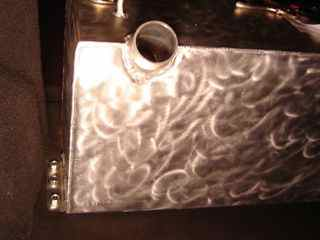
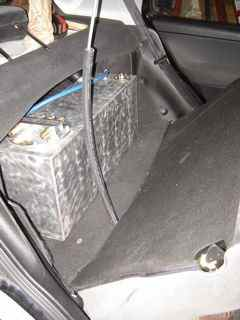
Our tank
placement decision did require that we replace the full size spare with a
mini-spare that would fit in the well under the vegoil tank.
To accommodate
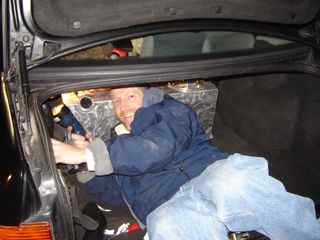
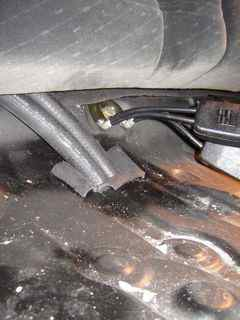
the vegoil fuel line, We drilled many holes under the back seat cushion,
knocked out a bigger hole, filed the edge, then lined the sharp sheet metal
edge with heater hose. The
pictures above show the process, but we ultimately ended up having to make the
holes much bigger to get both the send and return lines in (see day 15 way below)
4:41 PM 5:50
PM

6:25 PM these are the coolant lines only-we had
to these lines out to install the inner aluminum line for the fuel, which you
will see below in day 15.

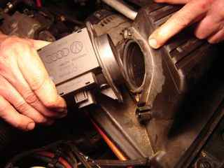
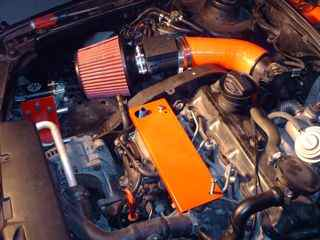
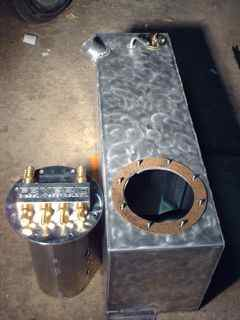
The Frybrid
vegoil tank requires a bit of preparation. We had to drill a few holes to attach the fuel gauge
Following
suggestions from others who had done this, we decided to put most of the works
including heat exchanger coil and
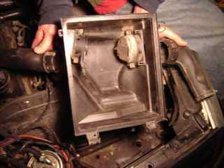
veggie oil filter right where the original air filter was, so taking out the
air filter assembly was necessary,
as summarized below.
11/10/2007 10:32
PM
11/10/2007 10:46
PM
Hurry
Up and Wait
Day
2: Sunday November 11, 2007 5:39 PM
Got a late
start, and immediately got stuck.
We were
following an internet blog put up by Jeff of JeffNLisa which can be found at http://www.frybrid.com/forum/showthread.php?t=3154
, but we couldn't get the air filter air supply tube to connect as they suggested, so we were stymied
for the night. We ended up
deciding to order a part online and take a break until we got it in the mail.
We couldn't get
this to fit on with the existing air hose.
Jeff at the blog above recommended getting
the folds to interlock, but we couldn't do it.
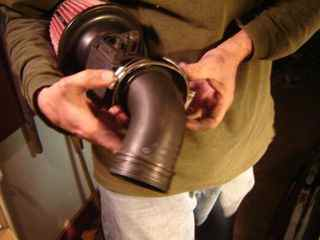
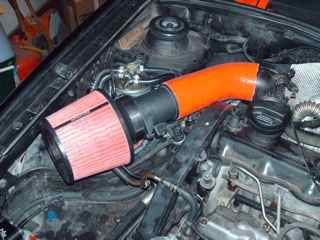
Air
Filter and Heat Exchanger
Day
3: Sunday November 18, 2007 4:06 PM
We had to order
the exact tube over the internet, and it took a week to get to us. We bought
one colored to match the painted heat exchanger coil.
We cut across
the hose at an angle to optimize the placement

but forgot our
geometry. The intersection of a
plane and a cylinder is only a circle if the cylinder is perpendicular to the
plane.
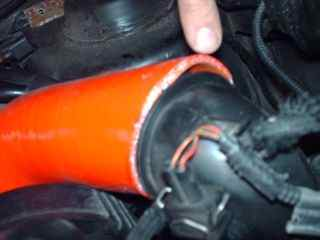
Re-cut it
perpendicular, and it stuck out a bit farther to the left than we wanted. But it worked! At the end is an aftermarket cleanable
air filter purchased from Murray's Auto.
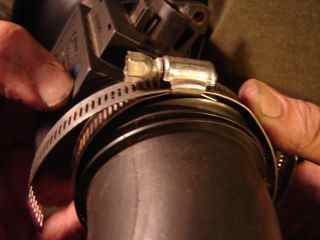
4:17 PM
Had to remove
part of the bracket on the oil heat exchanger coil to get it to fit, and make
some adjustments (i.e. smash up) the cavity where the air filter used to go
4:23 PM 5:26
PM
7:42 PM
The
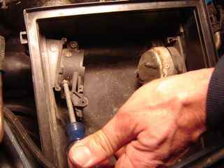
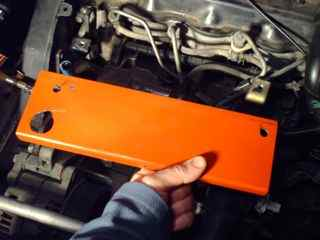
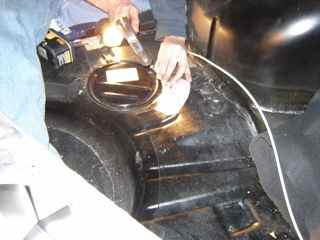
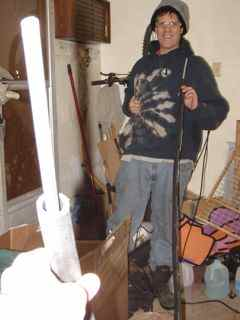
Mounting Plate: Solution to switch placement conundrum.
Day
4: Wednesday 11/21/2007 9:29 PM
We
didn't see a feasible way to mount the fuel switches in the existing engine
compartment. Michael came up with
an awesome solution: a (color
coordinated) mounting plate which he fabricated to hold the fuel switches. This mounted right where the normal
engine cover used to be, though this engine was missing its cover.
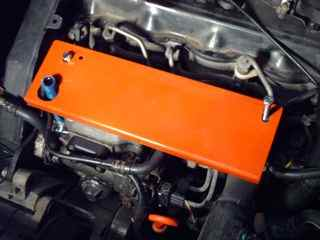
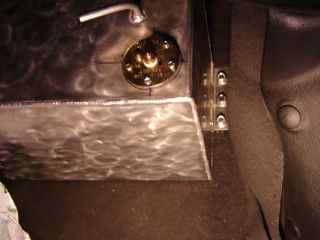
Fuel
system and ready the tank mount
Day
5: Saturday 11/24/2007 8:32 PM
The fuel
switches are shown here mounted on the mounting plate
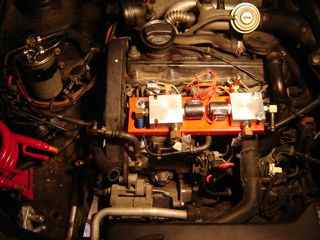
Michael also created a bracket for the vegoil fuel filter
assembly, shown here
The vegoil fuel filter fit exactly in an existing circular hole,
it is shown below at the left.
9:53 pm
To get the
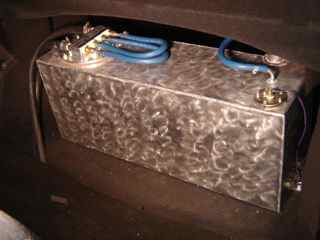
vegoil tank to fit where we wanted it, right behind the back seat, we had to
slightly adjust the sheet metal in the trunk. The circle is the diesel tank gauge assembly, so we had to
hammer VERY carefully.
After Midnight
Day 6: Sunday 11/25/2007 12:11 AM
More careful
hammering and drilling around the diesel fuel guage assembly. You can see the
well for the spare tire on the
left.
11/25/2007 4:53
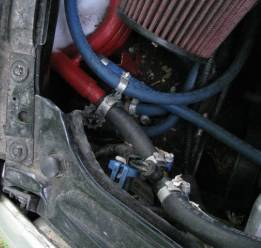
AM
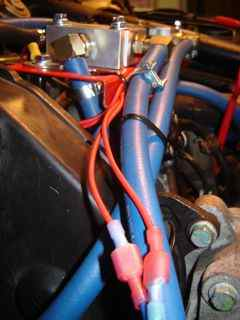
The engine
compartment is starting to shape up.
At the center of the picture , the silver square at upper left is the
fuel switch, the square to the lower right in the middle is the fuel return
switch.
Aesthetic
Improvements and a temp sensor
Day
7: Monday 11/26/2007 9:25 PM
10:25 PM Assembling the inline coolant
temperature sensor. When the temp
sensor gets got enough, it causes the two fuel switches to engage, switching
the fuel supply to the veggie oil tank, and the fuel return back to the veggie
oil tank. When the thermo switch
is not engaged, the default settings of the switches cause the system to draw
from the diesel tank and return fuel to the diesel tank.
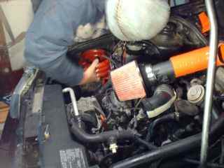
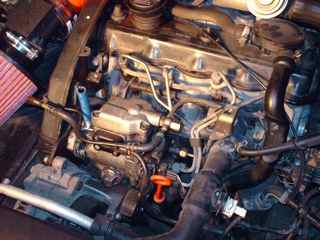
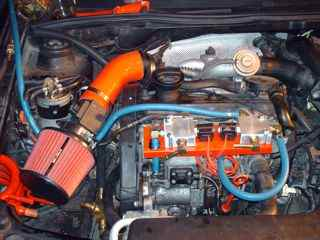
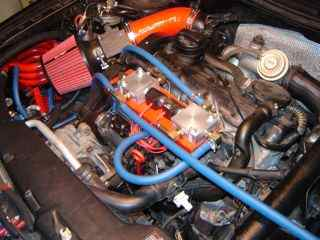
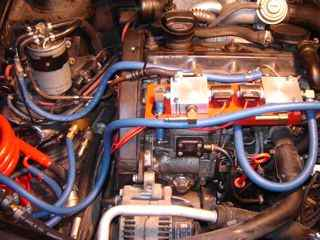
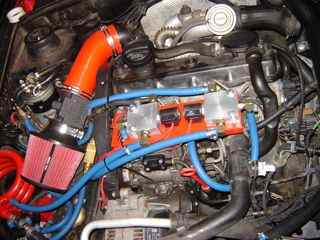
Engine
Compartment Completion!
Day
8: Tuesday 11/27/2007 2:26
AM
more connections
to the heat exchanger, veg fuel filter and diesel filter complete. The veg fuel filter is hidden in the
lower left corner of the picture below.

You can see the
location of the veggie oil fuel filter in the picture below, marked with the
Frybrid logo.

11/27/2007 5:01 PM
The completed
engine compartment:
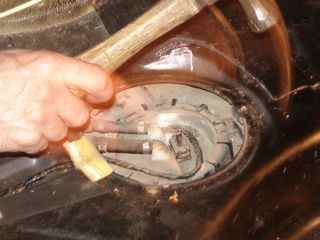
Prep
the tank and its mounting location
Day
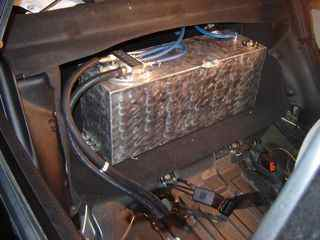
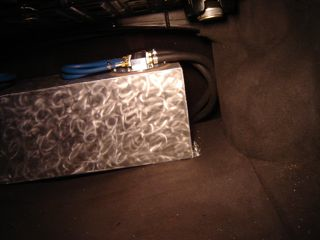
9: Saturday 12/1/2007 4:31 PM
With
our chosen location for the tank, we lost very little useable space in the
trunk, and the backseat was completely unaffected. Since we were installing a fuel filler cap on the outside of
the car, the placement of the tank deep in the trunk was not an inconvenience
for filling with veggie oil.
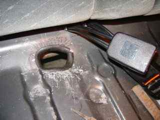
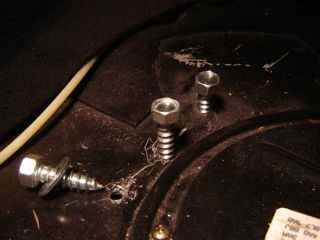
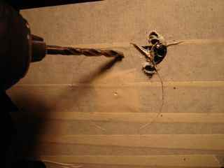
Drilling
the holes for the sheet metal screws to hold down the tank.
slight
adjustments to the precut hole for the tank heat exchanger

I was trying to
check the calibration of the vegoil fuel gauge. Little did I know that the car's battery which I was using
as a power source was depleted (I found out hours later). That's why the gauge didn't even reach
the full level in the lower right picture. Thus, my calibration check attempt was useless.
12/1/2007 6:57
PM
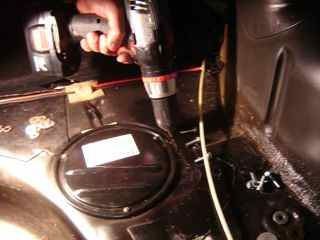
Wiring
and attach the vegoil tank
Day
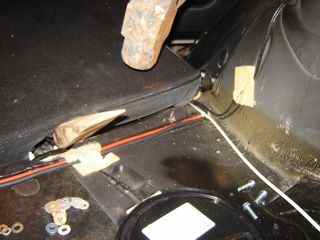
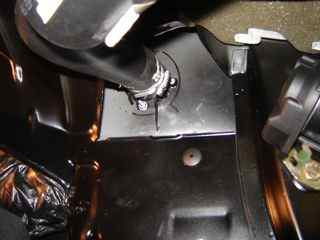
10: Sunday 12/2/2007 4:21 PM
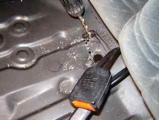
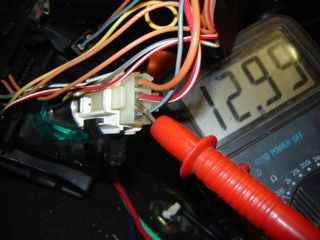
We
inserted all the wiring through a blank "grommet" in the firewall.
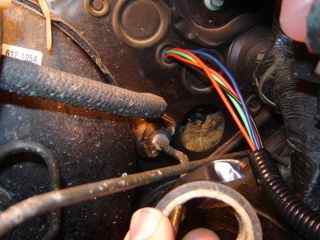

The large metal
weight used to give the gear shifter some inertia was colliding with one of the
installed vegoil hoses, so the hose had to be secured up higher with a zip tie.
electrical
connections powering the fuel switches
Sheet metal
screws to hold down the tank.
These were very awkward to place and put in.
10:38 PM
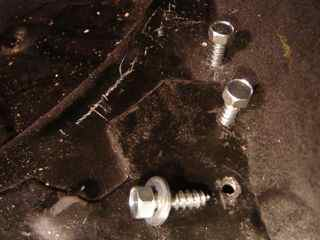
Had to cut holes
to accommodate the sheet metal screws
in the trunk liner.
The sheet metal
screws in place and tank secure.
11:18 PM
Vegoil
Fuel filler
Day
11: Monday 12/3/2007 12:25 AM
Took
a while to install, but it sure looks sweet.

12:49 AM


2:06 AM
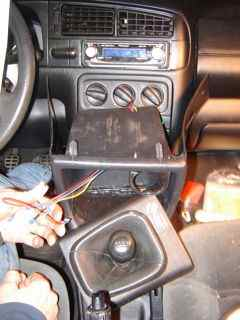
1212
Prep
for Electrical Work
Day
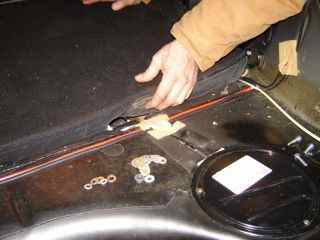
12: Tuesday 12/4/2007 2:09 PM
We found it
useful to tape the seat back release so we could easily open and
close the seat
back. Otherwise, you need two
people to do it (both sides must be released simultaneously)
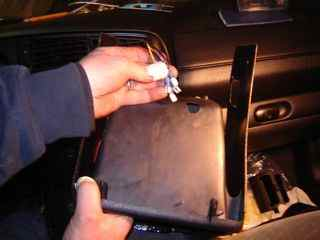
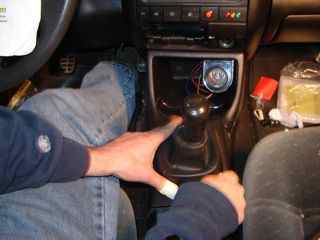
We wanted to put
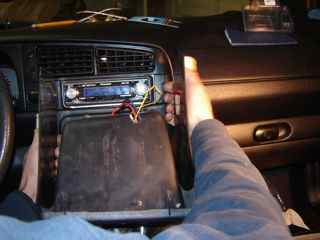
all the electronics behind the dashboard.
We had to sever the plastic piece which housed the gear shift, otherwise
we wouldn't be able to remove it easily. This cut made our job immensely
easier, and it wasn't detectable when we put it back together.

12/4/2007 5:01 PM
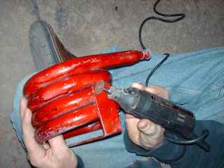
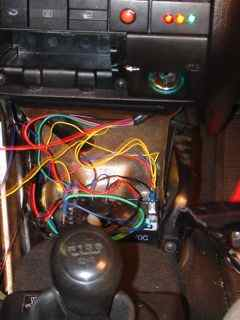
Wiring
Frenzy
Day
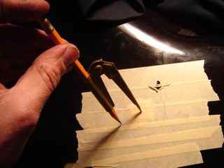
13: Wednesday 12/5/2007 3:17 PM
Marking
the wires, then marking the wiring diagram helped immensely.

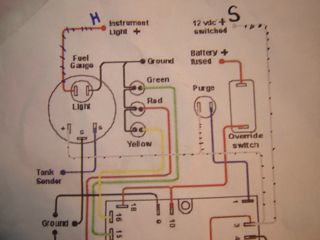

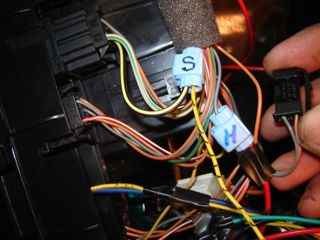
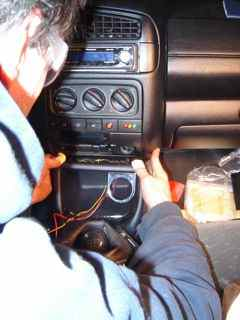
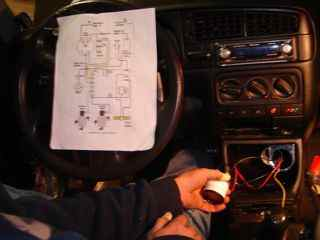
Here's a
close-up of that circuit
diagram. Michael cleverly color
coded the actual wires, by drawing stripes on them with a pen, just as they are
here-
a red wire with
blue stripes gets connected to "Hot" and a white wire with
black stripes
gets connected to the ""Switched" power.
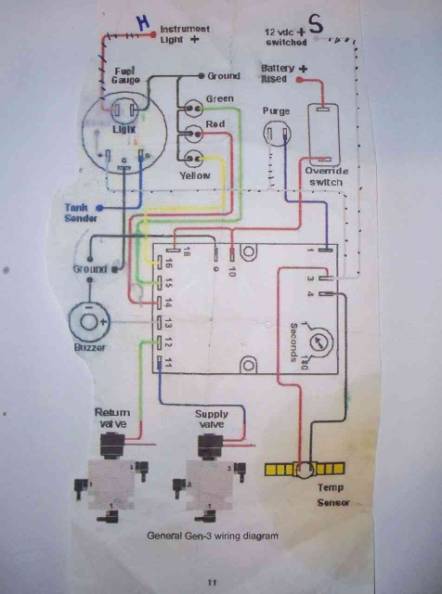
Vegoil Fuel
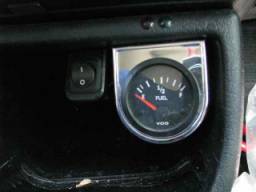
gauge wired up and installed
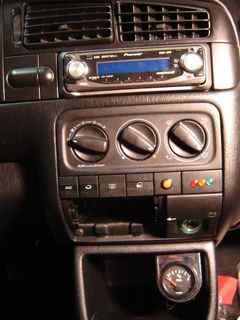
12/5/2007 8:34 PM
The dashboard lights buttons and indicators fit well into blanks
in the dashboard.
![]()
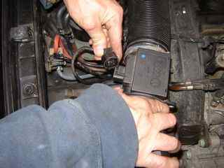
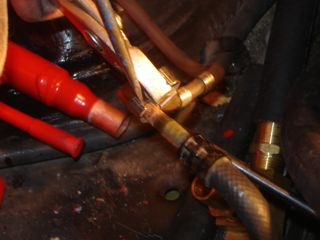
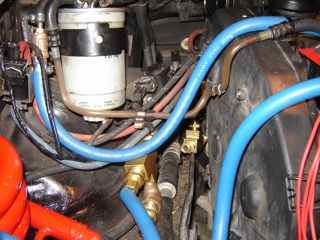
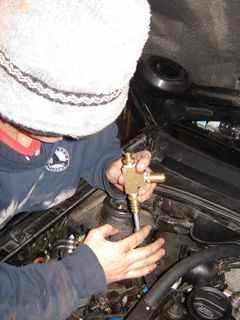
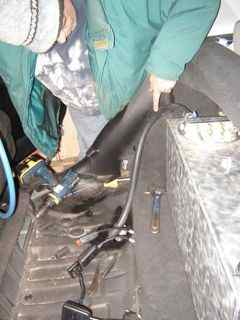
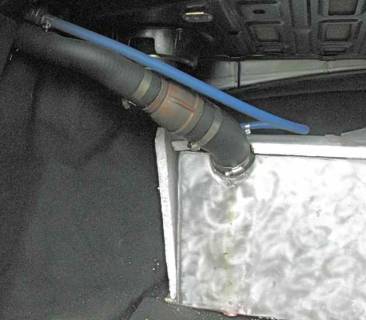
Hosed: Finish the filler hose, and hose in
hose fuel supply and return
Day
14: Thursday 12/6/2007 8:12 PM
Fuel filler
hose, must be diesel proof so expensive!
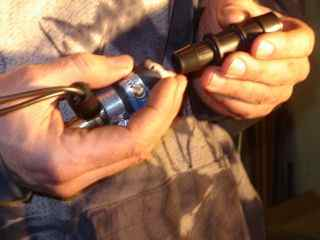
Cutting
aluminum fuel line to length.
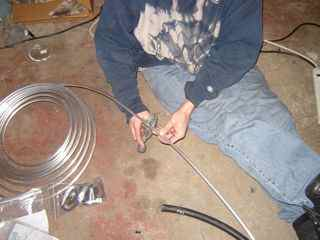
Threading hose
in hose
This brass
fitting allows you to separate the coolant line from the vegoil fuel line after
the hose in hose run.
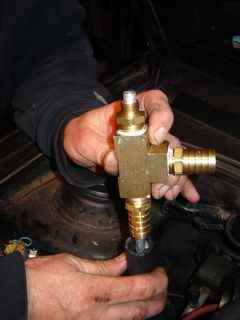
12/6/2007 10:15
PM
One of the hose
in hose lines close to final placement.
the view of this
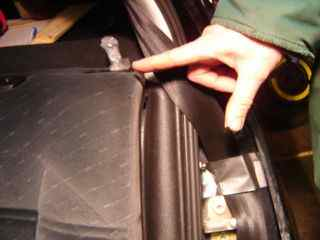
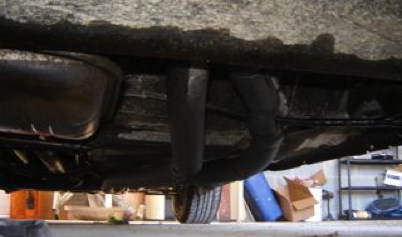
line from below the car, going up into the passenger compartment.
We had to bend the seat back slightly to accommodate the hose in
hose lines.
12/6/2007 11:03
PM
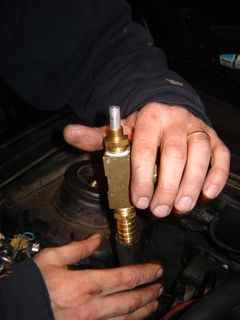
It is critical
not to kink the aluminum line which is within the black radiator hose, so you
have to try to avoid sharp angles in the line. Here Michael is indicating the sharpest turn we had to make
with the line, as it went into the tank heater/fuel pickup.
11:08 PM
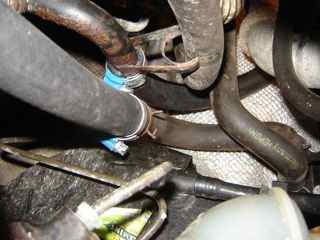
Day
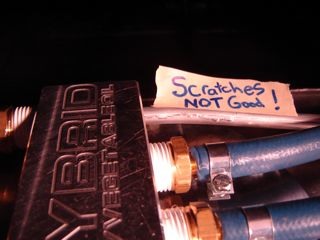
15 Let's wrap this sucker up!
12/7/2009 1:51 AM
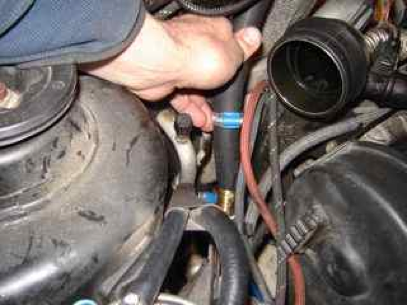
Since you don't
want the coolant and the veggie oil to commingle, scratches on the aluminum
vegoil supply tube is a bad idea-if they are deep enough, they could cause a
leak which could contaminate vegoil with coolant or vice versa. Luckily, we never seemed to have any
problem with that despite the scratches visible in the aluminum line:
Had to increase
the size of the hole under the back seat to accommodate the gradual bend of the
hose in hoses.
Some cut heater
hose dulled the sharp metal edges of the hole.
The view from
the trunk of the hoses attaching to the tank pickup heater
The view of the
fuel filler from inside the trunk.
Though we assumed the vegoil would run downhill and never leak out from
the loose attachment, in the picture below
Sloshing veggie
oil caused some to leak out, so we
eventually replaced the above with a diesel proof/leak proof tube adapter shown
in the picture below. The blue
hose in this picture is air hose which is needed from the tank to the fuel
filler to allow the air to escape when adding fuel.
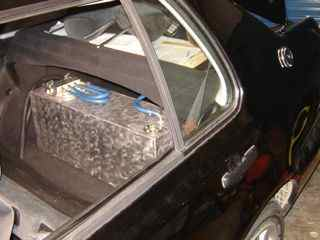
I was very happy
with the tank placement. The
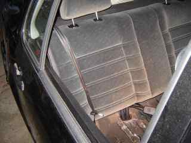
trunk was still very voluminous,
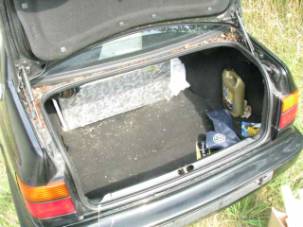
The seat back
could be locked in the upright position making the tank invisible.
The installation
is complete except for the purge timing.
We used the fuel
dye with biodiesel. Not a good
idea because of the cold weather, but we didn’t have any petrodiesel on hand.
When we did the
test, we inexplicably got 90 seconds purge time. We found out later that the purge time was supposed to be
less than 10 seconds. We still
don't know why this happened, and it may indicate a bad fuel pump, or an
incorrectly done purge test.
We fueled up the
next day and had our maiden "voyveg"
It worked!! It
even ran quieter and smoother on vegoil than it did on petrodiesel!! What a
rush!
The fly in the
ointment though was that it took about 20 miles to get hot enough to get the
vegoil system to kick on, and even when it was at peak temp, I had to get off
the expressway, and rev the engine to get the thermo-switch to activate.
The logical
first step was to replace the thermostat, because it might have been stuck open
causing low engine temps. Problem
was, WHAT A HASSLE TO CHANGE THE THERMOSTAT ON A VW JETTA!!
12/15/2007 4:12
PM
We finally
finished the job at 6:15 pm. When
we tested it, it did not significantly decrease the warm up time. In other words, it was not due to the
thermostat. But, we eliminated
that possibility.
Intermission-Dewatering
and Filtration System November
15-December 15.
Simultaneously
with the conversion, the all
important filtration and dewatering project was going on. I bought the design for a hand pump
operated filter and dewatering unit from
Dana Linscott , which can be found at http://vegoilconversions.netfirms.com/,
and gave my environmental science students the task of finding all the
components on the internet. The
students found many of the parts we ended up using, and a parent from the
community who did filtration work professionally for the auto industry donated
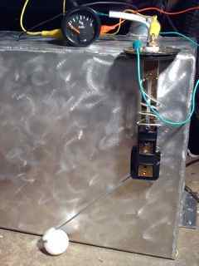
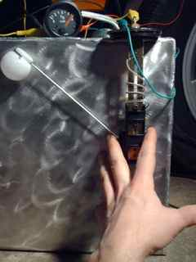
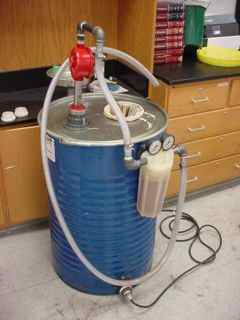
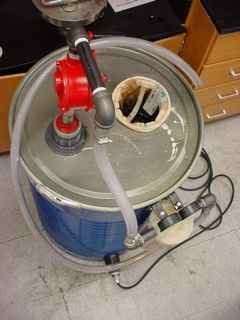
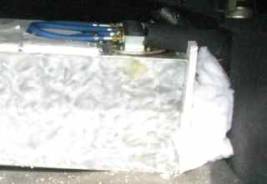
many of the parts necessary, and helped us put it all together. What we ended up with is shown below.
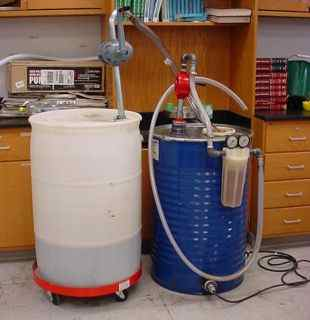
To work it, I
simply rolled the plastic 55 gallon drum down to the school's cafeteria where I
pumped waste vegetable oil from the fryer into it. Then I would roll it back to my classroom, pump the oil into
the sock filter (the white circle
on the top right) which filtered it down to 10 microns. The blue barrel has a heater element in
it which heats the oil to cause the water to evaporate as well as help the oil
flow quicker. From there it could
be pumped through the 5 micron filter (at the front of the unit) and into my
tank or storage containers.
To make sure
your oil is dewatered enough you can use the "crackle test" very well
explained at http://www.noria.com/learning_center/category_article.asp?articleid=301&relatedbookgroup=OilAnalysis
Day
16 Thursday Dec 7, 2007
Changing the
thermostat didn't greatly improve the 20 mile preheating necessary to switch
over to veggie oil, so we thought there might be some air trapped in the heat
exchanger. We used a commercial
flush and fill kit and purged the air out of the heat exchanger. This got messy. Make sure you have a way to catch the
coolant below the car-it must get flushed down a toilet connected to a city
sewer in order to be broken down by bacteria. DON"T PUT IT DOWN THE STORM SEWER OR LEAVE IT IN THE
STREET! It is poisonous to all
animals, who are attracted by the sweet smell.
11:00 pm
Because that
procedure was so messy, I fabricated a flush and fill drain outlet, by buying a
new cap for the coolant reservoir and attaching a hose sized male fitting. This way, you can drain the coolant
right into a hose and into the toilet.
Flushing the air
out of the heater core slightly reduced our distance and time for vegoil fuel
startup, to about 18 miles. Still
frustrating.
We finally had
success in reducing warm up time and distance when we added significantly
more thermal insulation everywhere.
We insulated the fuel/coolant lines in the engine compartment and to the
vegoil tank. We
added Styrofoam insulation in
front of the radiator, and really tried to seal off the engine compartment from
incoming air. We then wrapped the temp sensor in a down jacket. Remember, we're in Michigan in winter,
so anywhere cold hits veggie oil, it makes us burn more diesel. We got it down
to about 5-7 miles of
preheat. Please note however, that
this only worked if I kept the cabin heat off completely for that 5-7 miles.
Turning the heat on extended the diesel time by double or triple, since it
drained precious heat out of the heater core.
Veggie
Oil Honeymoon
December 7,
2007 (95, 093 miles) -Feb 15 2008
(98,009 miles)
The car ran
quite well for the next month.
I had to do a bunch of tweaks like tightening the vegoil filter which
was leaking, and re-insulating everything several times over.
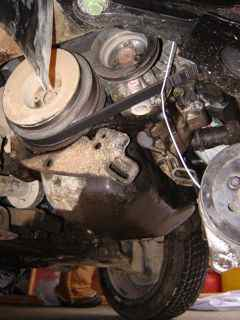
Disaster
strikes
Thursday Feb 15,
2008
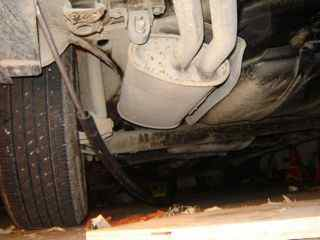
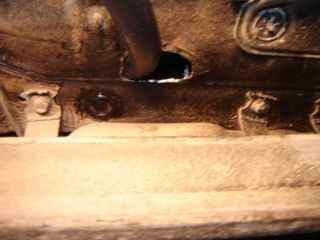
These two
connections shown at the bottom of the picture were right above an opening in
the bottom of the engine compartment.
The opening was not supposed to be there, but there were two
under-engine mud shields that were missing when we bought the car. I got these later, but it was too
late.
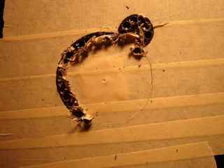
Splattering
water and mud soaked the connectors and they corroded, causing a bad
connection, but only for the RETURN switch.
WARNING: DO NOT LET YOUR RETURN SWITCH FAIL-THAT
IS ONE OF THE PRIME WAYS YOU CAN DAMAGE YOUR VEHICLE.

We permanently
soldered these connections later,
as well as adding two more indicator lights above the veggie fuel gauge
(shown below) to show if the fuel
switches were operating, but by
then it was too late.
![]()

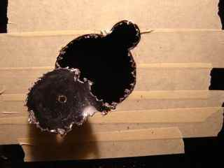
What happened
when the fuel return switch
connection failed: while the veggie fuel supply switch is on, but the
return switch is off, flow defaults back to the diesel fuel tank, even when the
veg oil supply is working. This
caused about eight gallons of vegetable oil to go into the diesel fuel tank, in
the middle of winter. The vegoil
tank was emptying incredibly fast, because it was all going into the diesel
tank!
The car had a
horrible time starting on the vegoil/diesel mix, as it was very cold
outside. I have a feeling that
this is where we did most if not all of the damage. I figured it out when my diesel tank fuel level was clearly
going up as I quickly ran out of vegoil.
So, we had to
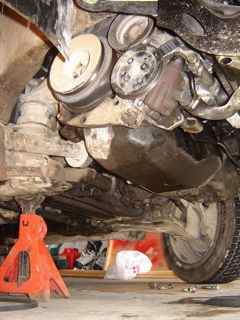
drain the vegoil out of the diesel tank..
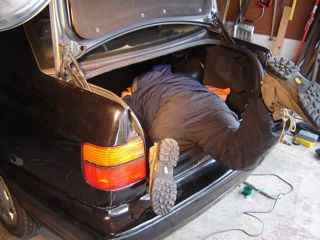
This was accomplished using an electric pump as shown below.
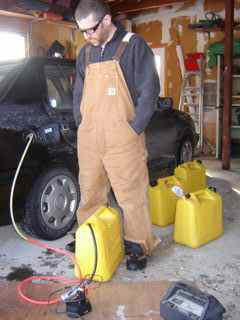
I had to stand
outside in the dead of winter changing out five-gallon containers for three
hours as they slowly drained out.
I then put pure diesel into the tank, and drained that out, added more diesel and drained it one
more time. I kept the
vegoil/diesel mixes in marked containers.

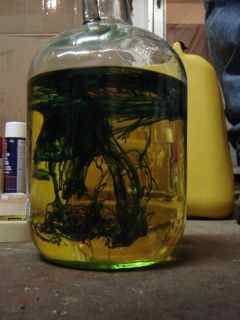
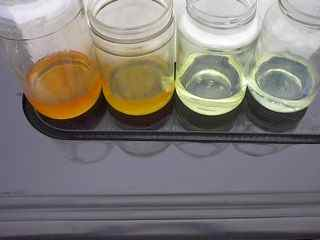
This pictures
does a pretty good job of summarizing the results of our efforts. To the left is pure vegetable oil, the
second from left is what we pumped out of the tank on the first try. You can see it looks pretty much like
veggie oil, which it was mostly.
The third from left is what I got out the last time I flushed the tank
with diesel, and the rightmost container is pure diesel.
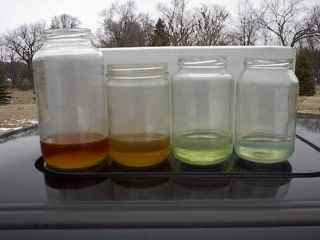
1. pure vegoil 2. pumped from tank 3. last flush, 4.
diesel fuel
2/23/2008 6:30
pm
The car seemed
to run fine after this episode, and Michael seemed not at all worried about
running the freezing cold veggie oil, so I went on my merry way driving the car
on veggie oil to and from work, excepting that first 5 miles each way, which
was run on diesel fuel (20% biodiesel).
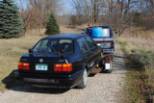
The bumper
sticker says "This car runs on waste vegetable oil and Biodiesel" and
the license plate is WVO VW
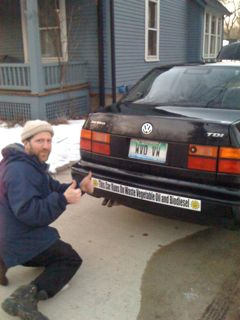
3/17/2008
I was greedy to
use less diesel though, so we rigged up a pre-heater using some copper tubing
and a water heater element.
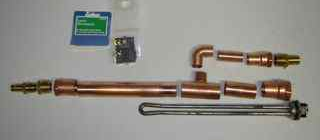
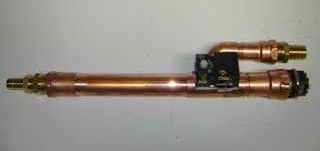
Consists of
copper tubing, an electric water heater thermostat, and a 10 amp, 120 V
electric water heater element.
For this
pre-heater to work, we had to get the coolant to flow even though the engine
was off. We installed a 12 V electric auxiliary centrifugal coolant pump made
for Volkswagen cooling systems (which often have weak water pumps anyway) in
series with the coolant line near the temperature sensor. The auxiliary pump
was powered by a 120 V AC to 12 V DC power supply which we put in parallel with
the battery, so the pump could run by AC power when the car was off, or DC when
the car was on.
The water heater
element could only run on 120 V AC. I plugged the power into a 20 Amp timer,
set to turn on an hour or more before I had to drive to work.
When the timer
went on, the heating element was energized and the pump pushed coolant through
the entire system including engine, veggie oil tank and heater core (not the
radiator). When I got in the car
on a frigid winter morning, the engine temp/coolant temp/and fuel in the tank
were already up to over 100 degrees F!
This got my diesel start up
time down to only three miles even in winter! It worked like a charm, and I
consider this electric pre-heater to be one of the greater successes of our
experiment.
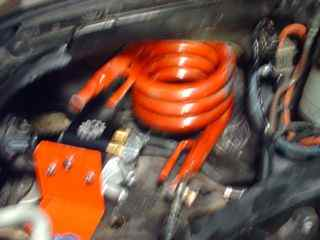
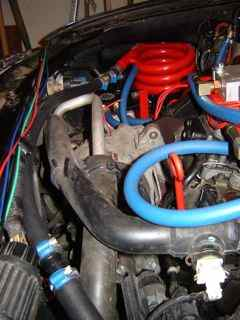
This picture
shows the inline heater in place, which we of course had to cover with
insulation, shown in process in the picture below it.

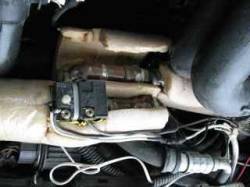
The following
photo stitch-up shows the inline heater in place, with all the components.
![]()
![]()
![]()
![]()
![]()

temp sensor inline
heater
thermostat
12 V aux pump
12 V power supply
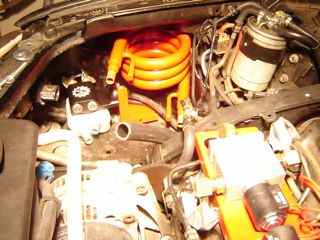
Shown below are
the switch for the auxiliary
coolant pump, which allowed me to turn the pump on or off at any time
(when plugged into an outlet, this switch is bypassed so the coolant is ALWAYS
flowing when the pre-heater is on.)
This manual switch also gave me the added bonus of being able to run the
heat much longer after a ride, even when the car engine is off, as it drew all
the thermal energy off of the entire engine, cooling system, and even the
heated fuel tank. (normally you only get the thermal energy that is left in the
heater core when you turn off the engine. ) Also visible above the veggie fuel gauge are the two extra
indicator lights we added to make sure both fuel switches were on when they
were supposed to be.
We connected a
120 V AC power cord to the whole thing, shown in picture below, which was
plugged in to an extension cord plugged into a timer so it would run an hour or
so before I woke up in the morning.
![]()

Thus, we got the
preheat distance down to three miles of running on diesel!!! The only problem we still had was that
the purge timing, being so excessively long, was still using up way too much
diesel fuel.
The
Bitter End 5/17/08 104,445 miles – 5/26/08 105,451 miles
My notes state
"Tomorrow I will re-insulate, and reduce purge time"
The 90 second
purge time that we had set it at initially was using up gallons of diesel. I consulted the folks at Frybrid who
told me the purge time should be under 10 seconds. I compromised and set it to 30 seconds. Something may have been wrong with our
lift pump, which was causing the long purge times, but I figured it should
still be purged within 30 seconds, over three times longer than it should
take. This may have been a crucial
mistake. Or, the damage may have
already been done by running all that cold vegetable oil in February.
On May 20 the
car wouldn't start. Purging the
injector pump made it start (after hours of experimenting) but it ran extremely
rough after that.
It started
hemorrhaging motor oil, while we were on vacation with it. It was having extreme difficulty starting so we couldn't stop the motor. We hobbled across lower Michigan
filling up a quart of oil every
stop. In the cars dying
gift to us, it got us within range of
range of AAA plus towing,
before WVOVW stopped running completely at around 105,451 miles on May 26 2008.
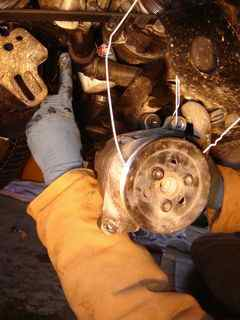
We found that
the motor oil filter was loose, so that may have been the cause of the oil
hemorrhage, but we never got it running after that, so we still can't be sure.
The compression
test revealed cylinder one at 320 psi, cylinder two at 80 psi, cylinder three
at 180 psi, and cylinder four-we
couldn't get to because the glow plug was glued in! The ones we could measure were much lower than they should
be.
The glued in
glow plug was a hint: If we didn’t' destroy the engine by
ourselves, we may have had some help from the previous owner, but we never
tested the compression ahead of time to find out.
I didn't have
enough time or cash to take the head off to see what is up. It might be bad rings, it might be a
bad engine, it could be a lot of things.
The lift pump might be bad, the injector pump might be bad, or all of
the above.
Additionally,
the sock filter that filters diesel fuel prior to the diesel fuel tank may be
clogged because of the vegoil to diesel tank catastrophe, so the diesel tank
may need to be dropped to clean that out.
We donated the
car to Michigan Technical Academy,
a charter school in the Detroit area.
MTA has a fantastic program in which students manufacture biodiesel to
fuel the school's buses! We hope
WVOVW will live on in some form or another, and if it doesn't live on, then I
sincerely hope WVOWV will rest in peace.


THE END
(for now)
Back to Homepage: